
This post may contain affiliate links. For detailed information please go to Disclaimer.
About Design
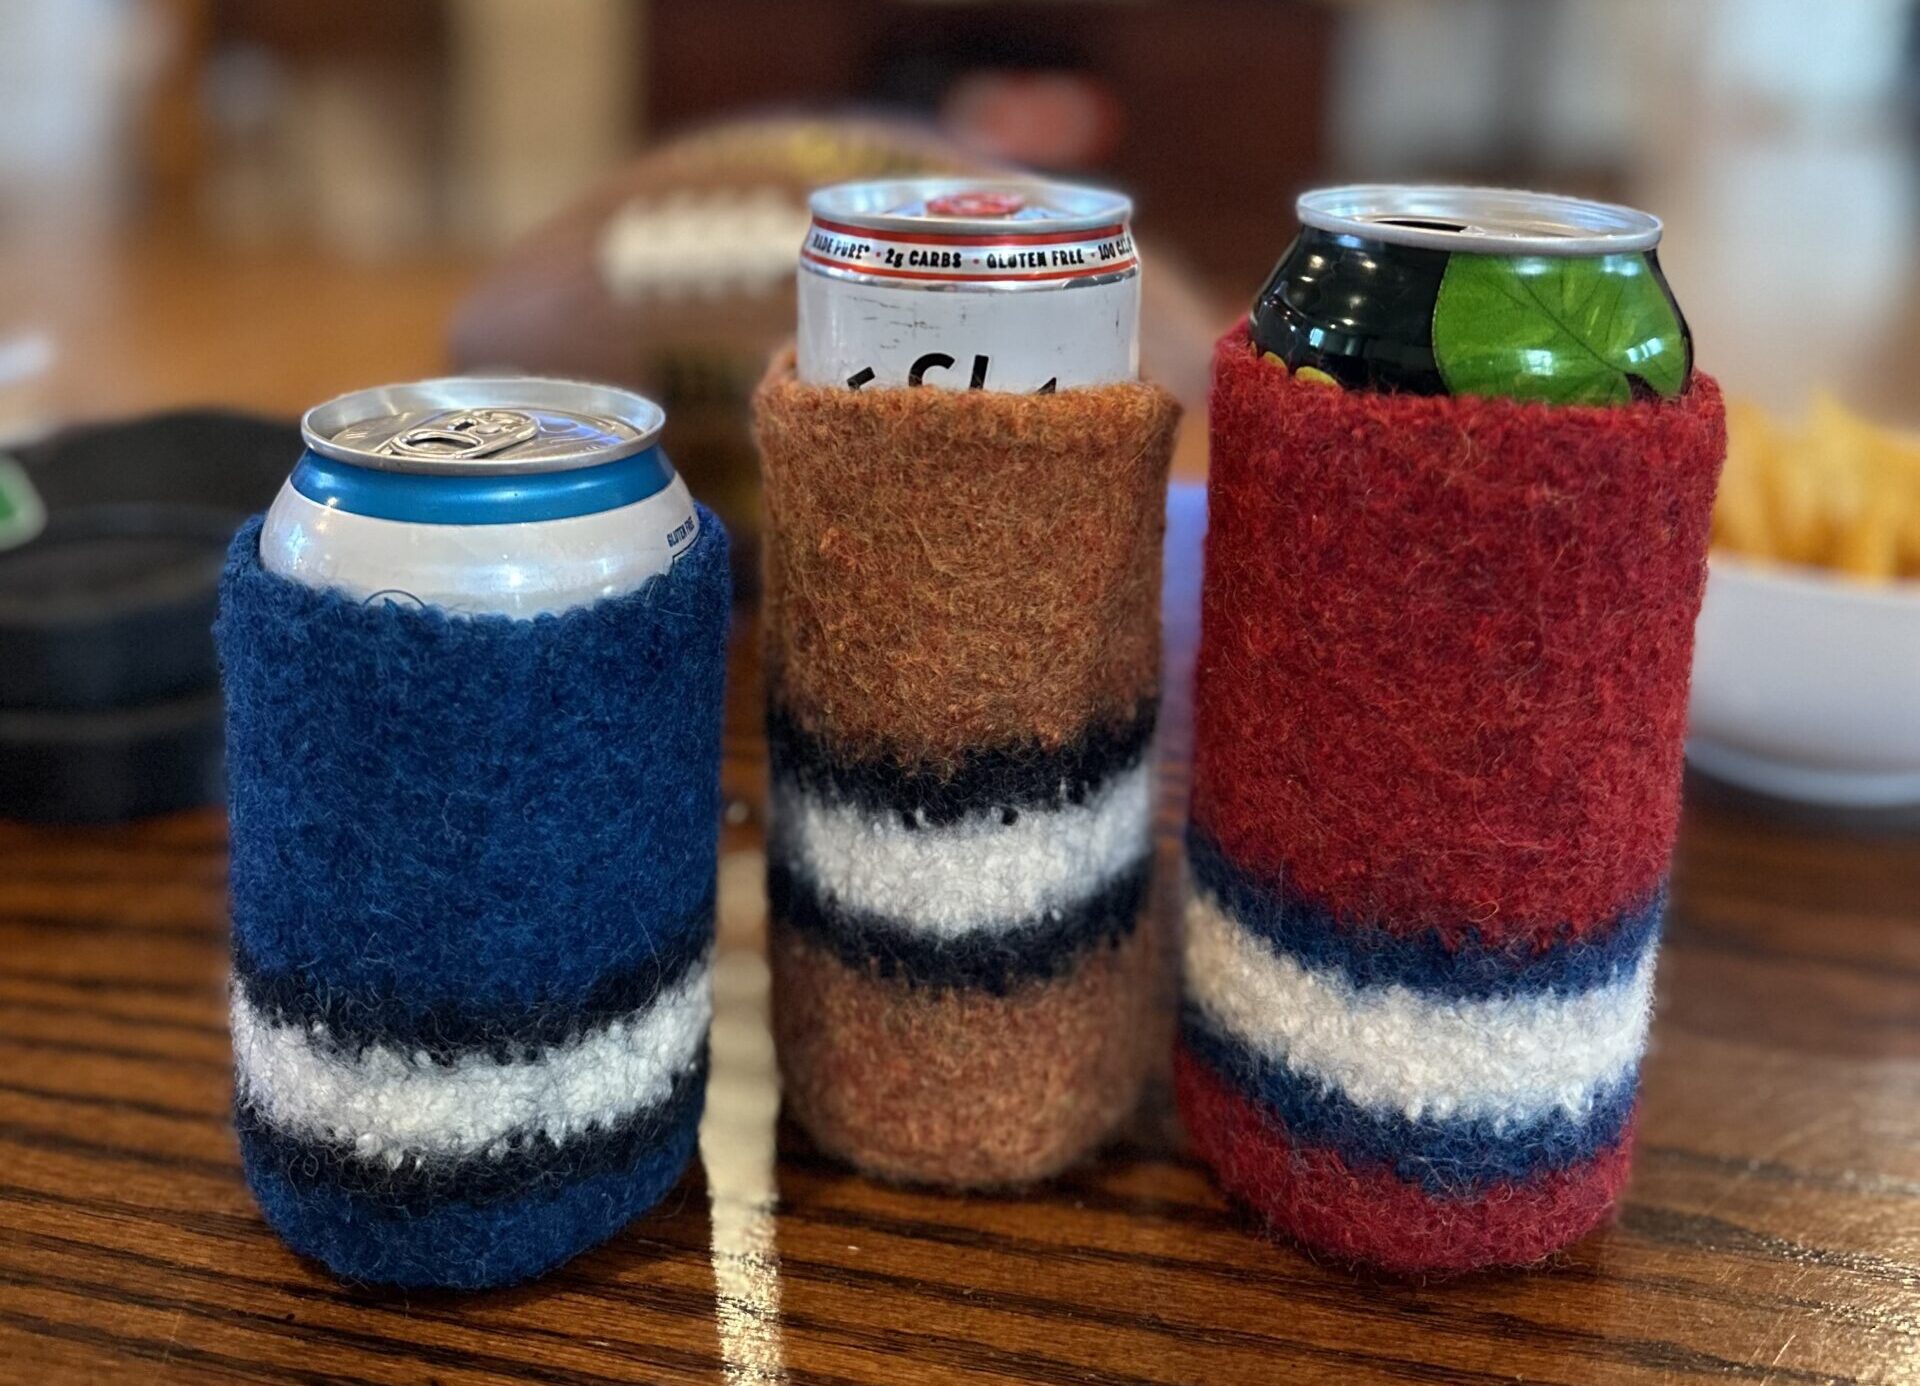
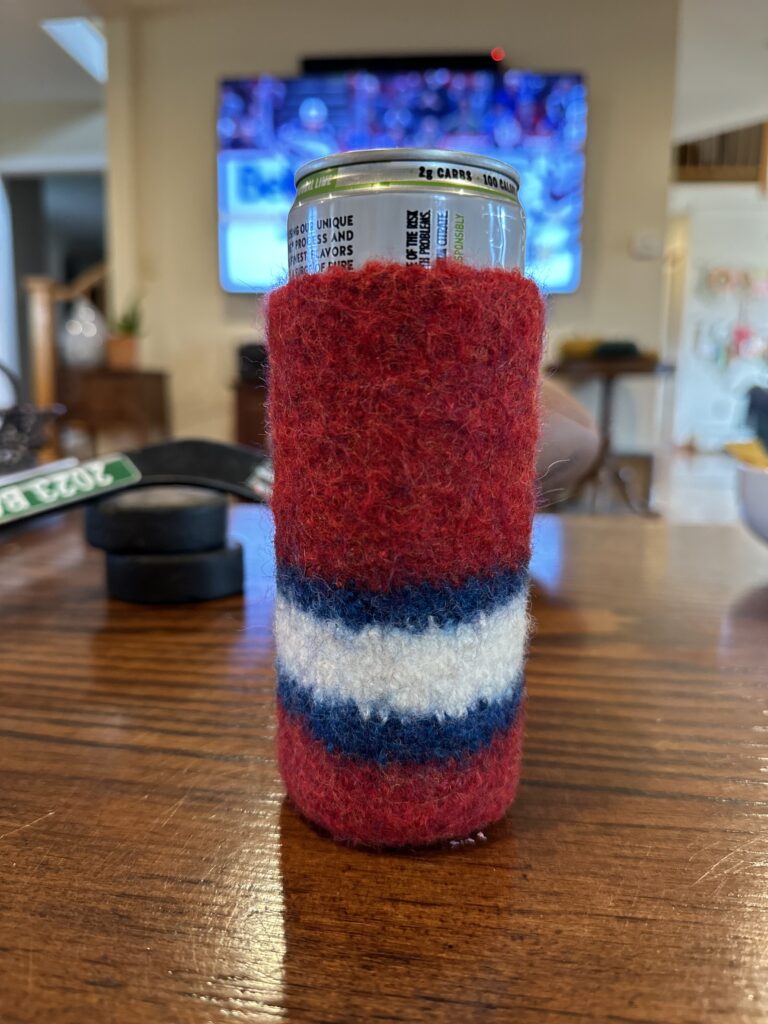
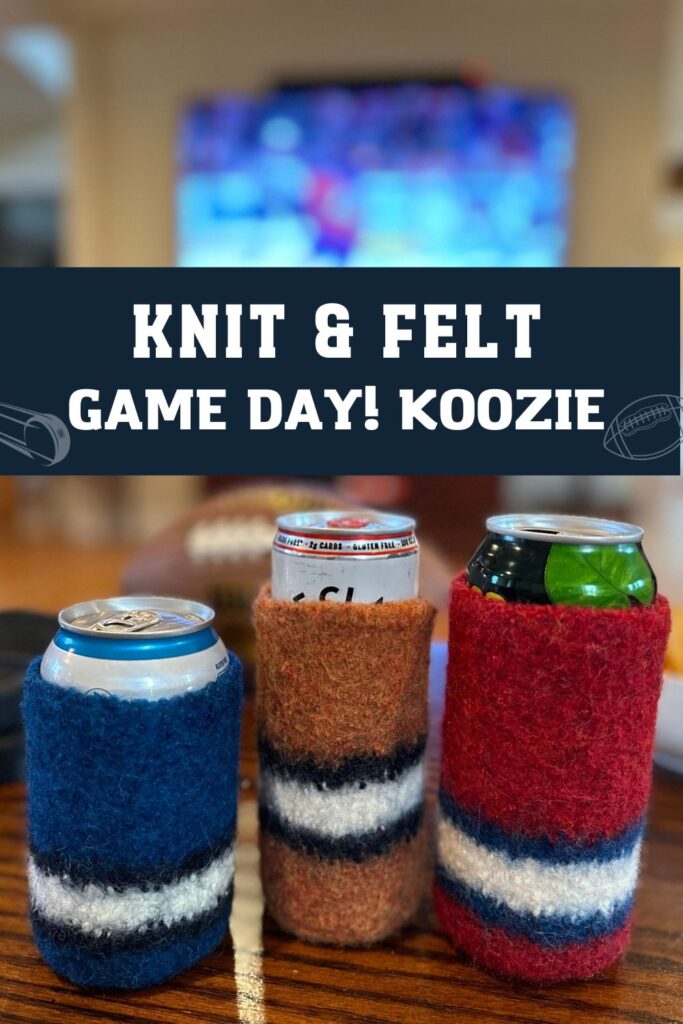
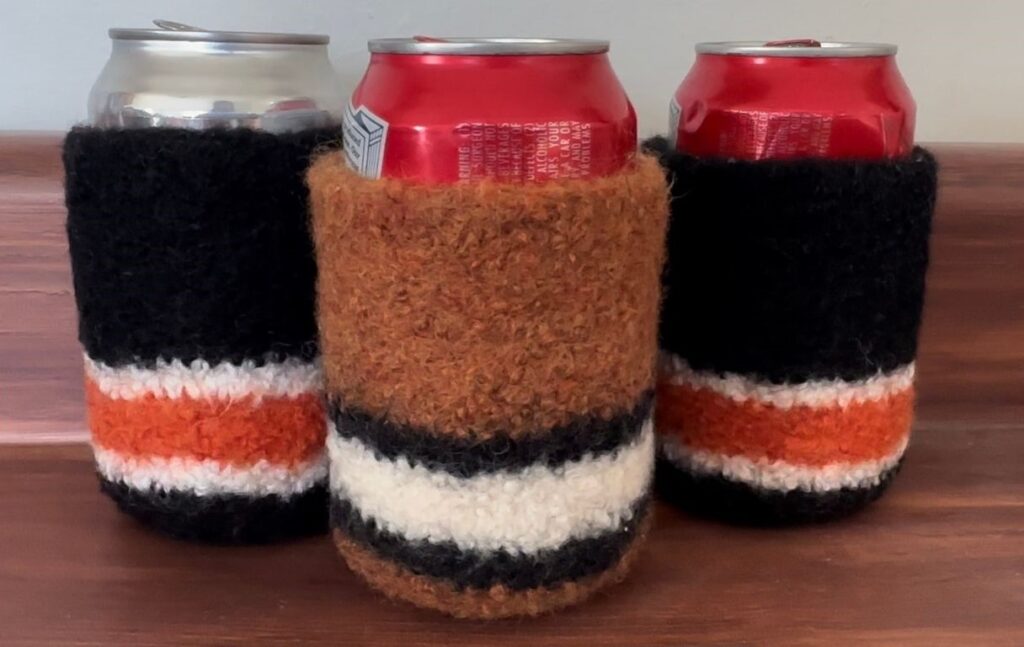
I was once intimidated by the idea of “felting” until a couple of years ago. I made a wine glass koozie and a bottle caddy for my friend’s winery to go with the holiday gift bundle. They quickly became one of the best-selling gift items, especially during the holiday season. This year, we have been traveling for my son’s hockey tournaments, which usually involve socializing with hockey families during hotel stays. So, I wanted to craft personalized can koozies for both my husband and myself. They turned out really well, so I’m excited to share the pattern with you. The pattern is made for three different can sizes: standard 12oz (355ml) can, Slim 12oz (355ml) can, and 16oz (478ml) pint can. I named it “the Gameday Koozie”, but feel free to remove the stripes for a solid color to create an entirely different style.
There are numerous ways to personalize these felted items. In a separate tutorial, I demonstrate how to repurpose waste yarn to add lettering.
If you are a visual learner, check the video listed below.
Yarn Used
I like using Wool of the Andes from Knit Picks, my go-to yarn for felting projects. It is a #4 worsted weight yarn with 110 yards per 50 grams.
These are the substitute yarn that the test knitters have used.
You can use any worsted yarn as long as the content is 100% wool. Although, each yarn act differently when it comes to felting. I highly recommend making a test swatch.
Pattern
- Get the ad-free, printable PDF pattern: Click HERE for the Etsy shop
- Add to your Ravelry Queue: Click HERE (Ravelry download also available with a purchase)
- Save this pattern for your future project on Pinterest: Click HERE to pin.
Materials
- US 10 (6mm) Knitting Needles
- 100% wool worsted weight yarn.
- Stitch Markers (Optional)
- Darning Needle
Gauge and Finished Measurement
- 4″ x 4″ = 16 sts x 24 rows in stockinette before felting
Abbreviation
BO – Bind Off
CO – Cast On
DPN(s) – Double Pointed Needle(s)
K – Knit
K2tog – Knit 2 stitches together
Rnd – round
St (s) – Stitch (es)
Pattern
With color A, CO 52 (45, 52) sts. Join and knit 22 (25, 30) rnds.
Switch to color B, and knit 3 (3,3) rnds.
Switch to color C, and knit 7 (7, 7) rnds.
Switch to color B, and knit 3 (3, 3) rnds.
Switch to color A, and knit 6 (8, 6) rnds.
Bottom Decreases
Divide your stitches on either double pointed needles or longer circular needles.
Continue with color A.
Rnd 1: *K2tog, K11 (7, 11); repeat from * to the end.
Rnd 2: *K2tog, K10 (6, 10); repeat from * to the end.
Rnd 3: *K2tog, K9 (5, 9); repeat from * to the end.
Work in the same manner to decrease 4 (5, 4) stitches in each rnd until you have 4 (5, 4) sts remaining.
Cut the yarn and weave it in the ends.

If you enjoyed this free pattern, please buy me a coffee to support my work 😊 It will help me create more free knitting patterns and tutorials.
Felting
Fill a bowl with hot water, which is not boiling but the hottest temperature you can handle to dip your hands in. I usually use house cleaning gloves for this process. Please be very careful not to burn your hands.
Add a drop of mild dish soap. Soak your knitted can koozie in the water and agitate. Once it is saturated, take it out of the water, roll between the palms of your hands, then dip it back in the water. Repeat this process for 5-10 minutes. Make sure to roll from different angles. It will start to feel stretchy and loose for the first couple of minutes, but keep going. You will feel it shrink and get thicker as you repeat. Once it is felted, put it on the wine glass to test how it fits. If it is too loose, put it back in hot water and repeat the felting process until it reaches the desired size. When it is done, lay it flat between a folded bath towel (fold a few times so you have several layers of towel). Gently push it down to get excess water out. Repeat this process a few times while changing to a dry area of the towel each time. Put the Koozie on the can, adjust the shape, and let it air dry.
Once it is dry, you can add a little touch. I’ve used customized leather labels from Local Laser Co. on Etsy and Ryelyn by Design. Embroidery and needle felting will be fun options too! If you would like to see how I felt letters using waste yarn like the picture below, click here for a tutorial.
Please come follow me on Instagram, Ravelry, and Pinterest to get updates! Also, join the Facebook or Ravelry group “Palmeri – LOVE to knit Group” to meet more knitters! I would be so grateful if you could share your finished projects on these platforms to spread the word💗