
This post may contain affiliate links. For detailed information please go to Disclaimer.
As holiday seasons are approaching, I bet your hands are getting busier creating beautiful gifts. This is one of the perfect quick knittings to add to your gift project.
Design
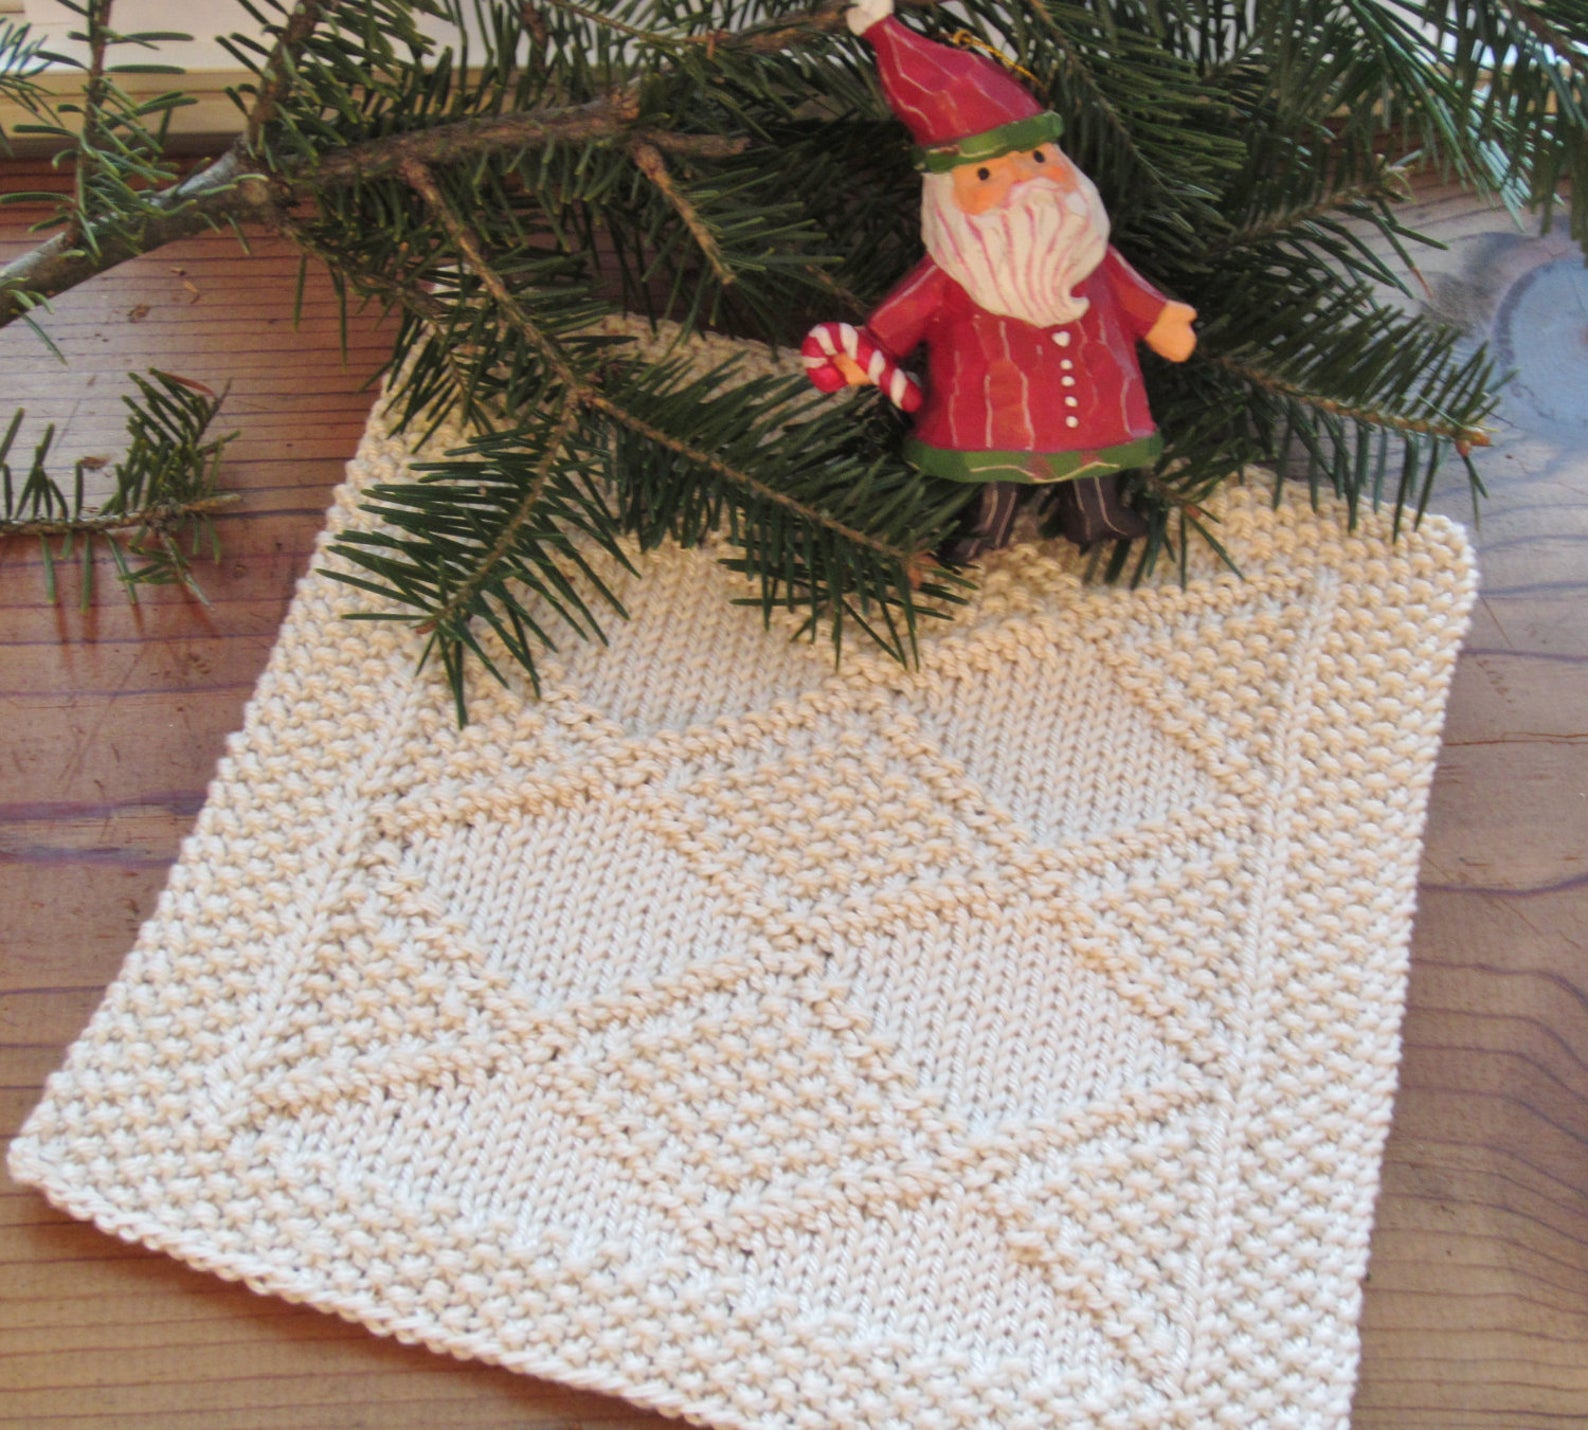
I made this washcloth about 8 years ago while I was trying to create a pretty spa cloth for my own (I LOVE taking a bath!) and also as a gift. It has been made multiple times for friends and family. It is also one of the finished products sold in my Etsy shop.
The pattern may look complicated, but it is VERY easy. All you need to know is how to knit and purl. The hardest part might be keeping track of which purl and knit stitches you have done. I love using the app called “Row Counter” which has horizontal and vertical highlighter that you can slide on the screen as you knit.
It is quick knit, so it is perfect for between larger projects to take a break. Make a few of them, add a handcrafted soap or a few of your bath time favorites, it will make an amazing holiday gift!

Yarn Used
You can use any cotton yarn that you love. The beauty of making a washcloth is that you don’t have to strictly worry about the gauge (unless you are aiming for the specific size, of course). I love the ease of just grabbing a ball of yarn and enjoying knitting!
As a spa cloth, I love using Cascade Ultra Pima which is a DK weight 100% Pima cotton yarn. The colors range from bright fun colors to calm neutral colors. The very soft texture and beautiful sleek look make this spa cloth extra luxurious!
Pattern
- Get the ad-free, printable PDF pattern: Click Here for Etsy Shop or Here for Ravelry Pattern Shop.
- Save this pattern for your future project on Pinterest: Click Here to Pin.
Materials
- US 6 (4mm) Knitting Needle
- DK Cotton Weight Yarn. Approximately 60 yards for one washcloth.
- Stitch Markers (Optional)
- Darning Needle
Gauge and Finished Measurement
- 4″ x 4″ = 24 sts x 28 rows
- Approximately 8 inch x 8 inch
Abbreviation
K- Knit
P – Purl
St – Stitch
SST – Seed Stitch consists of knits and purls that alternate horizontally and vertically like a checker board. (knit on top of a purl, and a purl on top of a knit)
Main Pattern
*Edge: Continue working on SST for the first and last 7 stitches as you work on the rows below. Placing stitch markers on each side of the edging can be helpful.
Row 1: Work on Edge, P1, *K1, P15; repeat from* once more, K1, P1, then work on the edge.
Row 2: Work on Edge, K1, P1, *P1, K13, P2; repeat from* once more, K1, then work on the edge.
Row 3: Work on Edge, P1, *P1, K2, P11, K2; repeat from* once more, K1, P1, then work on the edge.
Row 4: Work on Edge, K2, *K1, P2, K9, P2, K2; repeat from* once more, K1, then work on the edge.
Row 5: Work on Edge, P1, *K1, P2, K2, P7, K2, P2; repeat from* once more, K1, P1, then work on the edge.
Row 6: Work on Edge, K2, *P1, K2, P2, K5, P2, K2, P1, K1; repeat from* once more, K1, then work on the edge.
Row 7: Work on Edge, P1, *K1, P1, K1, P2, K2, P3, K2, P2, K1, P1; repeat from* once more, K1, P1, then work on the edge.
Row 8: Work on Edge, K2, *P1, K1, P1, K2, P2, K1, P2, K2, P1, K1, P1, K1; repeat from*once more, K1, then work on the edge.
Row 9: Work on Edge, P1, *K1, P1, K1, P1, K1, P2, K3, P2, K1, P1, K1, P1; repeat from*once more, K1, P1, then work on the edge.
Row 10: Work on Edge, K2, *P1, K1, P1, K1, P1, K2, P1, K2, P1, K1, P1, K1, P1, K1; repeat from* once more, K1, then work on the edge.
Row 11: Repeat Row 9
Row 12: Repeat Row 8
Row 13: Repeat Row 7
Row 14: Repeat Row 6
Row 15: Repeat Row 5
Row 16: Repeat Row 4
Row 17: Repeat Row 3
Row 18: Repeat Row 2
Repeat row 1-18 two more times.

Then work on Edging for 8 rows.
Bind off all stitches. Weave in all ends.
If you enjoyed this free pattern, please buy me a coffee to support my work 😊 It will help me create more free knitting patterns and tutorials.
Please come follow me on Instagram, Ravelry, and Pinterest to get updates! Also, join the Facebook group “Palmeri – LOVE to knit Group” to meet more knitters! I would be so grateful if you could share your finished projects on these platforms to spread the word💗