


This post may contain affiliate links. For detailed information please go to Disclaimer.
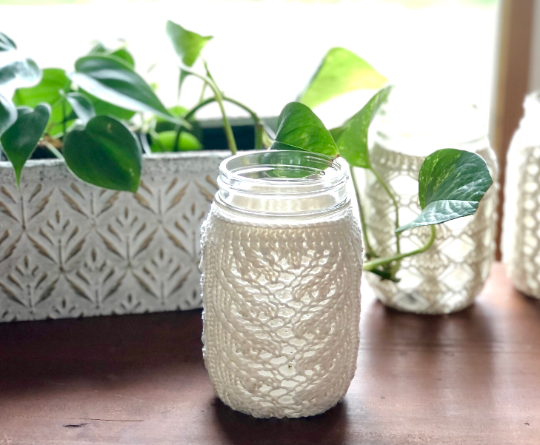
Macrame Cord Trivet was created as a finished product last summer, and it was a popular product as a gift. Recently, I had a lady inquiring about this pattern. So, I made the pattern official for other knitters to whip up this summer. I introduced a Mason Jar Cover pattern last week for a quick summer knitting project, but this trivet can be made much faster than the cover. In fact, it is by far the easiest and quickest knitting project I have ever worked on!
About Design
The pattern is so easy and beginner-friendly. It starts with a long-tail cast on and continues with garter stitches all the way to the end. I used slip stitches so it will create a cleaner edging. The trickiest part would be weaving in the ends since the cord is very sturdy and thick. The trick is to pull the core of the cord and cut it off. So it will be flat and thinner to fit in the eye of the tapestry needle (Highly recommend this one here) and allow it to blend in.
Follow-along video is also available 👇👇
Yarn Used
In this case, it is “Cord Used”😏 I used Bobbiny Premium Macrame Cord for this project. The cord is made with 100 % recycled fiber and also complies with the regulations of OEKOTEX® Standard 100. If you don’t know what OEKOTEX Standard 100 means, it is a worldwide label for textiles tested for harmful substances. The test is done on every step of production, from raw materials to intermediate to end products (Click HERE for details). Since the trivet is used in a kitchen around foods, it is nice to know we are using a safe material. If you have decided to use a different cord, make sure the material is 100% cotton or other heat resistance material(s). Synthetic materials won’t do well as a trivet.

Pattern
- Get the ad-free, printable PDF pattern: Click HERE for the Etsy shop
- Add to your Ravelry Queue: Click HERE (Ravelry download also available with purchase)
- Save this pattern for your future project on Pinterest: Click HERE to pin.
Materials
- US 15 (10 mm) Knitting Needles
- 5mm 100% Cotton Braided Macrame Cord. Approximately 33 yards.
- I heard Max and Herb linked above is currently not available. This seller might be a great choice with a low shipping cost.
- Darning Needle (The linked needle is THE BEST when you have chunky yarn!)
- Optional: Customized Leather Tag

Gauge and Finished Measurement
- 4″ x 4″ = 9 sts x 18 rows
- The finished item measures approximately 8″ x 8″
Abbreviation
CO – Cast On
K – Knit
P – Purl
St (s) – Stitch (es)
Sl – Slip
Main Pattern
CO 19 sts using your favorite CO method. I used a simple long-tail CO.
Row 1: Sl 1 Knitwise, K until one stitch remained on the needle, Sl 1 knitwise.
Row 2: P1, Knit until the last stitch, P1.
Repeat Row 1 and 2, 17 more times.
Bind Off.
Cut the yarn leaving about 4″ tail. Weave in the ends.
*Tip: Pull the core of the cord and cut a few inches. It will flatten the cord and make it easier to weave in.

If you enjoyed this free pattern, please buy me a coffee to support my work 😊 It will help me create more free knitting patterns and tutorials.
Please come follow me on Instagram, Ravelry, and Pinterest to get updates! Also, join the Facebook or Ravelry group “Palmeri – LOVE to knit Group” to meet more knitters! I would be so grateful if you could share your finished projects on these platforms to spread the word💗


[…] I made the macramé trivet pattern, I wanted to use chain edges. So I used English Slip stitch selvedge, which creates a beautiful […]